How to change a mailbox lock
Changing a mailbox lock is a simple process that you can do on your own. Whether you want to upgrade your lock for added security or you’ve lost the key, knowing how to change a mailbox lock can save you time and money. In this step-by-step guide, we will walk you through the process of changing a mailbox lock.
Step 1: Gather the necessary materials
Before you begin, make sure you have all the tools and materials you need. You will need a new mailbox lock, a screwdriver, and possibly a wrench depending on the type of lock you have. It’s also a good idea to have a pair of pliers on hand in case you encounter any stubborn screws.
Pro tip: It’s always a good idea to check with your local post office or homeowner’s association before changing your mailbox lock to ensure compliance with any regulations or guidelines.
Step 2: Remove the old lock
The first step in changing a mailbox lock is to remove the old lock. This can usually be done by unscrewing the screws that hold the lock in place. Use a screwdriver or wrench to loosen and remove the screws. Once the screws are removed, you should be able to pull the lock out of the mailbox door.
Note: Some mailbox locks may have additional security features, such as a metal clip or pin, that need to be released before the lock can be removed. Refer to the manufacturer’s instructions for your specific lock if you encounter any difficulties.
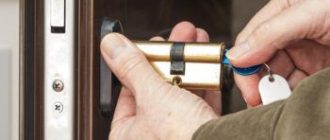
Step 3: Install the new lock
Once the old lock is removed, it’s time to install the new lock. Start by inserting the new lock into the hole in the mailbox door and aligning it properly. Insert the screws and tighten them using a screwdriver or wrench. Make sure the lock is secure and the screws are tight.
Pro tip: If your new lock came with any additional security features, such as a metal clip or pin, make sure to follow the manufacturer’s instructions for proper installation.
With these simple steps, you can easily change a mailbox lock and ensure the security of your mail. Remember to always follow any guidelines or regulations set by your local post office or homeowner’s association to avoid any issues.
How to Change a Mailbox Lock: Step-by-Step Guide
If you are looking to change the lock on your mailbox, this step-by-step guide will show you how to do it. Whether you’ve lost your key, the lock is damaged, or you just want to upgrade to a more secure lock, changing your mailbox lock is a straightforward process.
Step 1: Gather the necessary tools
Before you begin, make sure you have the following tools:
- A screwdriver (usually a flathead or Phillips)
- A new lock and key
- A small container to hold screws
Step 2: Remove the old lock
Use the screwdriver to unscrew the screws holding the current lock in place. Once the screws are removed, the lock should easily slide out of the mailbox door. Take care not to damage the surrounding area or any parts of the mailbox during this process.
Step 3: Insert the new lock
Take the new lock and insert it into the hole where the old lock was. Make sure it is securely in place before moving on to the next step.
Step 4: Tighten the screws
Once the new lock is in place, use the screwdriver to tighten the screws and secure the lock to the mailbox door. Take care not to overtighten the screws, as this could damage the lock or the mailbox door.
Step 5: Test the new lock
Before completing the process, make sure to test the new lock to ensure it is working properly. Insert the key and turn it to make sure the lock engages and disengages smoothly.
Step 6: Dispose of the old lock
Properly dispose of the old lock and any associated materials. You can check with your local recycling center or waste management facility for guidance on how to dispose of these items.
Note: It is always recommended to consult the manufacturer’s instructions for your specific mailbox lock model before attempting to change the lock.
With these step-by-step instructions, you can easily change the lock on your mailbox. Remember to take your time and exercise caution throughout the process to avoid any mishaps or damage to the mailbox.
Important Considerations Before Starting
Before attempting to change your mailbox lock, there are a few important considerations to keep in mind:
|
1. Assess the need for a lock change |
|
It’s essential to determine whether you really need to change the lock on your mailbox. Evaluate the condition of the current lock and consider if it’s damaged, outdated, or compromised in any way. If you suspect that someone has unauthorized access to your mailbox, changing the lock is highly recommended. |
|
2. Gather the necessary tools |
|
Changing a mailbox lock requires specific tools, including a screwdriver, pliers, and a new lock cylinder or lockset. Make sure you have all the necessary tools at hand before starting the process to avoid interruptions or delays. |
|
3. Check the mailbox regulations |
|
Before proceeding with the lock change, it’s important to check any regulations or guidelines set by your local postal service or homeowners association. Some jurisdictions have specific requirements regarding mailbox locks, such as size, design, or approved lock types. Ensure that the new lock you choose complies with these regulations to avoid any potential issues. |
|
4. Consider hiring a professional |
|
Changing a lock may seem like a straightforward task, but it can be more complex than it appears, especially if you’re unfamiliar with lock mechanisms or have limited DIY skills. If you’re unsure about your ability to change the lock yourself, consider hiring a professional locksmith who can ensure a secure and proper installation. |
|
5. Take safety precautions |
|
When working with locks, it’s crucial to prioritize safety. Avoid rushing the process, follow the manufacturer’s instructions carefully, and wear protective gear if necessary. Additionally, keep the keys and any sensitive information regarding the lock change secure to prevent unauthorized access or potential security breaches. |
By considering these important factors before starting the lock change process, you can ensure a smooth and successful mailbox lock replacement while maintaining the security of your mail.
Gather the Required Tools
Before you can change a mailbox lock, you will need to gather the necessary tools. Having these tools on hand will make the process much smoother and easier. Here are the tools you will need:
1. Screwdriver: Depending on the type of lock, you may need either a flathead or Phillips screwdriver. This tool will be used to remove the screws securing the lock to the mailbox.
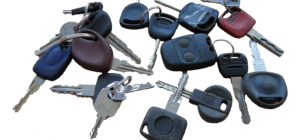
2. New Lock: Make sure you have a new lock that is compatible with your mailbox. There are different types and sizes of locks, so choose one that matches your needs.
3. Replacement Key: If your new lock does not come with a key, you will need to have a replacement key made. You can either have a locksmith create a new key or order one from the manufacturer.
4. Lubricant: It’s a good idea to have some lubricant, such as WD-40, on hand to help loosen any stuck or rusty parts of the lock.
5. Towel or Cloth: Having a towel or cloth nearby will be helpful for wiping away any dirt or debris from the lock and mailbox.
By gathering these tools beforehand, you’ll be well-prepared to change the lock on your mailbox. This will save you time and ensure a successful lock replacement.
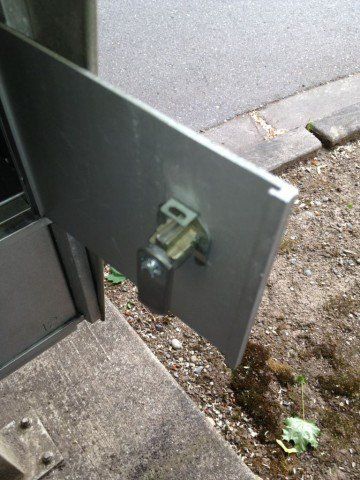
Remove the Existing Lock
To change the lock on your mailbox, you will first need to remove the existing lock. Follow the steps below:
- Make sure you have the necessary tools for the job, such as a screwdriver or pliers.
- Locate the screws or bolts that are holding the lock in place.
- Use the screwdriver or pliers to remove the screws or bolts.
- Once the screws or bolts are removed, carefully pull out the lock from the mailbox door.
- Inspect the lock and make sure there are no damages or signs of wear and tear.
- If the lock is in good condition, set it aside to be reused or disposed of properly.
- If the lock is damaged, take note of the type and size of the lock so you can purchase a suitable replacement.
By following these steps, you will be able to remove the existing lock from your mailbox and prepare it for the next step: installing the new lock.
Analyze the New Lock
Before you begin the process of changing the mailbox lock, it is important to analyze the new lock. Take a close look at the lock and familiarize yourself with its components and mechanisms. This will help you better understand how the lock works and make the installation process easier.
Inspect the lock: Examine the lock to see if it is a cylinder lock, a cam lock, or a combination lock. Each type of lock has its own unique features and requires a different approach for installation.
Check the key: Verify if the new lock comes with a set of keys. It is recommended to have at least two keys for the mailbox lock. Ensure that the keys fit smoothly into the lock and turn easily without any resistance.
Examine the lock cylinder: Look for any damage or wear on the lock cylinder. If the cylinder is scratched or worn out, it could affect the functionality of the lock and compromise the security of your mailbox.
Read the manufacturer’s instructions: If you are unsure about any aspect of the new lock, refer to the manufacturer’s instructions. These instructions will provide valuable information on how to install the lock correctly and ensure its optimal performance.
By analyzing the new lock beforehand, you can avoid any surprises or difficulties during the installation process. Understanding the lock’s features and functionality will enable you to proceed with confidence and successfully change the mailbox lock.
Follow the Manufacturer’s Instructions
When changing a mailbox lock, it is important to follow the manufacturer’s instructions. These instructions will provide you with the specific steps and tools required to successfully change the lock. Here are some general steps to follow:
| Step 1 | Review the manufacturer’s instructions provided with the new mailbox lock. |
| Step 2 | Gather the necessary tools and materials as specified in the instructions. This may include a screwdriver, pliers, and the new lock. |
| Step 3 | Ensure that you have a clear workspace and a stable surface to work on. |
| Step 4 | Remove the existing lock from the mailbox using the recommended method provided in the instructions. |
| Step 5 | Install the new mailbox lock according to the manufacturer’s instructions. This may involve inserting a key, aligning the lock, and securing it with screws. |
| Step 6 | Test the new lock to ensure that it functions properly. Use the provided key to open and close the mailbox. |
| Step 7 | Dispose of the old lock properly, following any disposal instructions included in the manufacturer’s guidelines. |
Remember to always follow the manufacturer’s instructions for the specific mailbox lock you are changing. This will ensure that the process is done correctly and that the new lock functions as intended.
Prepare the New Lock
Once you have successfully removed the old mailbox lock, it is important to properly prepare the new lock before installing it. Follow these steps to ensure a smooth installation:
1. Examine the new lock: Carefully inspect the new lock to ensure that all the necessary components are included and in good condition. Check for any defects or missing parts that may affect its functionality.
2. Read the instructions: Before proceeding with the installation, read the manufacturer’s instructions thoroughly. Familiarize yourself with the specific steps and requirements for installing the new lock.
3. Gather the necessary tools: Make sure you have all the required tools handy, such as a screwdriver, wrench, or any other tools specified in the instructions. Having everything ready will save you time and prevent any delays during the installation process.
4. Prepare the mailbox: Clean the mailbox to remove any dust, debris, or old lock fragments from the previous lock. Ensure that the inside of the mailbox is dry before installing the new lock.
5. Insert the key: Before inserting the new lock, test the key in the lock to ensure that it turns smoothly and without any resistance. If there are any issues with the key, contact the manufacturer for a replacement.
6. Lubricate the lock: Apply a small amount of lubricant to the keyhole and moving parts of the new lock. This will help facilitate the smooth operation of the lock and prevent any potential sticking or jamming in the future.
7. Check the orientation: Pay attention to the orientation of the lock and make sure it is correctly aligned with the opening in the mailbox. Double-check that the lock will be positioned in the desired location before proceeding with the installation.
8. Plan the installation: Consider the best approach to install the new lock, whether it requires unscrewing any existing parts or fitting the lock into specific slots. Prepare a strategy based on the instructions and the layout of your specific mailbox.
By following these steps, you will be well-prepared to install the new lock on your mailbox with confidence and ensure its smooth operation.
Install the New Lock
Once you have removed the old lock and have obtained a new lock, you can proceed with installing the new lock on your mailbox. Here is a step-by-step guide on how to do it:
- Start by inserting the key into the new lock and turning it clockwise to align the lock cylinder.
- Position the new lock on the hole where the old lock used to be, making sure it aligns properly with the screw holes.
- Take out the key from the new lock and set it aside.
- Using a screwdriver, secure the new lock in place by tightening the screws into the screw holes.
- Double-check that the lock is securely attached and aligned with the mailbox door.
- Test the new lock by inserting the key and turning it to ensure smooth operation.
By following these steps, you can successfully install the new lock on your mailbox. Make sure to keep the key in a safe place and remember to change the locks periodically to ensure the security of your mailbox.
Test the New Lock
After you have successfully changed the lock on your mailbox, it is important to test the new lock to ensure that it is working properly. Follow these steps to test the new lock:
- Insert the key into the lock.
- Turn the key clockwise to lock the mailbox.
- Try to open the mailbox by turning the key counterclockwise. The lock should prevent the mailbox from opening.
- Remove the key from the lock.
- Repeat steps 1-4 to verify that the lock is consistently functioning as expected.
If the lock is not working properly, you may need to repeat the process of changing the lock or consult a professional locksmith for assistance.
Secure the Mailbox
The mailbox is an important part of your home’s security, as it is often targeted by thieves looking for personal information or valuable packages. Taking steps to secure your mailbox can help protect your mail and prevent unauthorized access.
Here are some tips on how to secure a mailbox lock:
- Choose a high-quality lock: A sturdy lock is essential for keeping your mailbox secure. Look for locks that are resistant to picking and tampering.
- Regularly inspect the mailbox: Check your mailbox regularly for signs of tampering or damage. If you notice anything suspicious, contact the postal service or your local authorities.
- Consider a lockable mailbox: If your mailbox doesn’t have a built-in lock, consider installing a lockable mailbox. These mailboxes feature a lock and key, providing an extra layer of security.
- Secure the area around the mailbox: Ensure that the area around your mailbox is well-lit and free from obstructions. This will make it more difficult for thieves to tamper with your mailbox undetected.
- Retrieve your mail promptly: Try to collect your mail as soon as possible after it is delivered. Leaving mail in the mailbox for extended periods can make it an attractive target for thieves.
- Monitor your credit and accounts: Regularly check your credit reports and bank statements for any suspicious activity. If you notice any unauthorized transactions, report them immediately.
- Use a lockable mailbox for outgoing mail: If you need to send outgoing mail, consider using a lockable mailbox or taking it directly to the post office. This will help prevent it from being intercepted or tampered with.
By following these steps, you can help keep your mailbox secure and protect your personal information.
Tips for Maintaining a Mailbox Lock
Proper maintenance of your mailbox lock is essential to ensure that it continues to function smoothly and securely. Here are some helpful tips to keep in mind:
- Regularly inspect the lock: Take a few moments every month to visually inspect your mailbox lock. Look for any signs of wear or damage, such as rust or bent parts. If you notice any issues, address them promptly to prevent further damage.
- Keep the lock mechanism clean: Dust, dirt, and debris can accumulate inside the lock mechanism over time, causing it to become sticky or difficult to operate. Use a soft, dry cloth or a small brush to remove any buildup and keep the lock clean.
- Avoid using excessive force: Using excessive force when turning the key or handle can cause the lock mechanism to wear down quickly. Always use gentle, even pressure when operating the lock to minimize unnecessary strain on the parts.
- Apply lubrication: Over time, the moving parts of the mailbox lock may start to dry out and become stiff. Apply a small amount of graphite lubricant or lock de-icer to keep the mechanism working smoothly. Be sure to follow the manufacturer’s instructions when applying lubrication.
- Protect the lock from the elements: Exposure to rain, snow, and extreme temperatures can cause the lock to deteriorate more quickly. If possible, position your mailbox in a sheltered area or use a mailbox cover to protect it from the elements.
- Report any issues to the mailbox provider: If you notice any persistent problems with your mailbox lock, such as difficulty opening or closing, it’s best to contact your mailbox provider right away. They can assess the situation and provide professional assistance or arrange for a lock replacement if necessary.
By following these tips, you can ensure that your mailbox lock remains in good condition and continue to provide reliable security for your mail.
Benefits of Changing Your Mailbox Lock
Changing the lock on your mailbox can provide a number of benefits. Here are a few reasons why you should consider changing your mailbox lock:
| Enhanced security: | By changing your mailbox lock, you can ensure that only authorized individuals have access to your mail. This can help protect sensitive documents and prevent identity theft. |
| Peace of mind: | Knowing that your mailbox has a secure lock can provide peace of mind, especially if you receive important mail or valuable packages. You can rest easy knowing that your mail is safe. |
| Prevention of mail theft: | Old mailbox locks can be easy targets for thieves. By replacing the lock, you reduce the risk of mail theft and ensure that your mail remains protected. |
| Convenience: | Installing a new mailbox lock can also give you the opportunity to choose a lock that is more convenient for you. You may want a lock that is easier to open, has a larger keyhole, or is compatible with modern technologies. |
| Improved appearance: | A new and well-maintained mailbox lock can improve the overall appearance of your mailbox. It can make your mailbox look more appealing and well-cared for, enhancing the curb appeal of your home. |
Overall, changing your mailbox lock is a simple and effective way to improve security, provide peace of mind, and enhance the functionality and appearance of your mailbox.
Common Mistakes to Avoid
When it comes to changing a mailbox lock, there are a few common mistakes that people often make. Avoiding these mistakes can help ensure a smooth and successful lock replacement process:
| Mistake | Explanation |
| Not having the right tools | Before attempting to change a mailbox lock, make sure you have the necessary tools on hand. These may include a screwdriver, pliers, and a new lock. |
| Forgetting to secure the mailbox | Before removing the old lock, it’s important to secure the mailbox to prevent any unauthorized access. Use a temporary lock or ask a neighbor to keep an eye on the mailbox while you work. |
| Not following the manufacturer’s instructions | Each mailbox lock may have specific installation instructions provided by the manufacturer. It’s important to read and follow these instructions carefully to ensure proper installation. |
| Using too much force | When removing or installing a lock, it’s important to use the correct amount of force. Using too much force can damage the lock or mailbox, while using too little force may result in an insecure lock. |
| Not testing the new lock | After installing the new lock, it’s essential to test it thoroughly before leaving the mailbox unattended. Make sure the lock functions properly and securely locks and unlocks. |
By avoiding these common mistakes, you can ensure a successful mailbox lock change and maintain the security of your mailbox.
Q&A:
What are the reasons to change a mailbox lock?
There are several reasons to change a mailbox lock, such as lost keys, damaged lock, moving into a new place, or wanting to upgrade to a more secure lock.
What tools do I need to change a mailbox lock?
You will need a screwdriver, a new lock and key, and possibly a drill if the lock needs to be removed.
Is it difficult to change a mailbox lock?
Changing a mailbox lock can be a bit tricky, especially if you’re not familiar with lock mechanisms. However, with the right tools and following a step-by-step guide, it can be done relatively easily.
Can I change my mailbox lock without professional help?
Yes, you can change your mailbox lock without professional help. As long as you have the necessary tools and follow the instructions carefully, you’ll be able to do it yourself.
How long does it take to change a mailbox lock?
The amount of time it takes to change a mailbox lock can vary depending on your experience and the complexity of the lock. On average, it can take anywhere from 15 minutes to an hour.