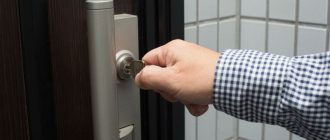
How to change a door lock cylinder
Are you looking to install, change, or replace a key lock cylinder on your door? This step-by-step guide will walk you through the process, ensuring that you have the necessary knowledge and tools to complete the job.
A door lock cylinder is an essential piece of door hardware that allows you to securely lock and unlock your door. Over time, these cylinders may become worn or damaged, making it difficult to use your key or compromising the security of your home. Fortunately, replacing a door lock cylinder is a relatively straightforward task that can be completed with a few simple tools.
Before you begin, it’s important to gather the necessary materials. You’ll need a new lock cylinder, a screwdriver, and a small Allen wrench. Additionally, it’s a good idea to have a pair of pliers on hand, as they can be helpful for removing stubborn screws or other hardware.
Once you have everything you need, follow these step-by-step instructions to change your door lock cylinder. Remember to take your time and be careful as you work, ensuring that each step is completed accurately and securely.
Gather the Necessary Tools
Before you begin the process of changing a door lock cylinder, it is important to gather all the necessary tools to ensure a smooth and efficient installation. Having the right tools on hand will help you complete the job safely and securely.
Here are the essential tools you will need:
- Screwdriver: A screwdriver will be necessary to remove the screws that hold the door lock cylinder in place.
- Replacement Cylinder: Make sure you have the new door lock cylinder that you will be installing. This is the actual cylinder that will replace the old one.
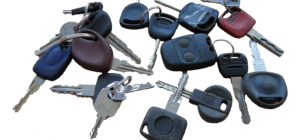
- Key: You will need the key that corresponds to the old door lock cylinder. This key will be used to remove the cylinder from the door.
- Replacement Hardware: Depending on the specific door lock cylinder you are installing, you may need additional hardware such as screws or bolts.
By gathering these tools beforehand, you will be prepared to successfully change the door lock cylinder and improve the security of your door.
Remove the Door Handle and Knob
Before you can change the lock cylinder, you need to remove the door handle and knob. Here are the steps to do this:
|
Step 1: Use the key to unlock the door and make sure it is fully open. |
|
Step 2: Locate the screws or fasteners on the interior side of the door handle and knob. |
|
Step 3: Use a screwdriver or Allen wrench to remove the screws or fasteners. |
|
Step 4: Once the screws or fasteners are removed, carefully detach the door handle and knob from the door. |
Removing the door handle and knob will give you access to the lock cylinder, which you can then change, install, or replace for improved security and peace of mind.
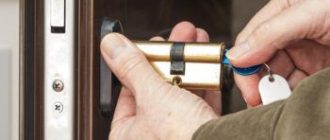
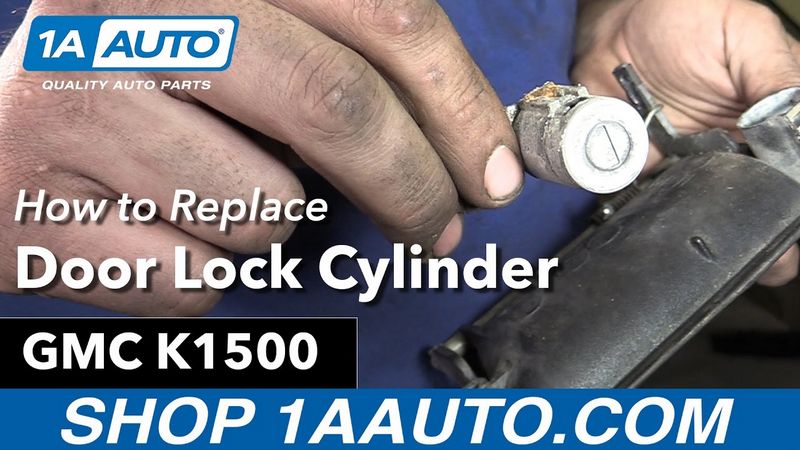
Take Out the Old Lock Cylinder
Before you can install a new lock cylinder, you need to remove the old one from your door. Follow these steps to safely remove the old lock cylinder:
- Start by ensuring that you have the correct key for the lock cylinder. Without the proper key, you won’t be able to remove the lock cylinder.
- Insert the key into the lock and turn it to the “unlock” position.
- Locate the retaining screws or clips on the hardware of the lock.
- Using a screwdriver or pliers, remove the retaining screws or clips.
- Gently pull the lock cylinder out of the door, taking care not to damage the surrounding hardware.
- If the lock cylinder is stuck, you may need to use lubricant or gently tap it with a hammer to loosen it.
Once you have successfully removed the old lock cylinder, you can proceed to replace it with a new one. Remember, replacing your lock cylinder is an important step in enhancing the security of your door.
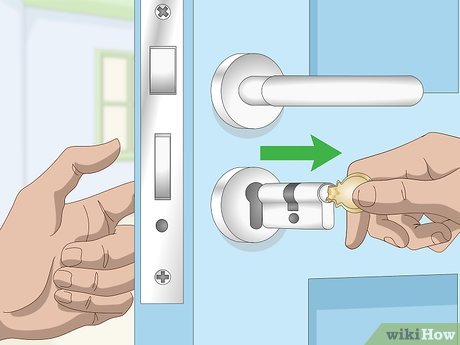
Insert the New Lock Cylinder
After removing the old lock cylinder, it’s time to install the new one. Make sure you have the correct replacement cylinder that is compatible with your door lock.
Begin by inserting the new lock cylinder into the door. Align the cylinder correctly, ensuring that the keyhole is facing outward and the cylinder fits snugly into the lock housing.
Note: Some lock cylinders may require slight adjustments or modifications to fit properly. Refer to the manufacturer’s instructions for any specific guidelines or steps.
Once the new lock cylinder is properly aligned and fitted, press it firmly into place. You should feel resistance as the cylinder locks into position.
Tip: To verify that the lock cylinder is installed correctly, insert the key into the cylinder and turn it in both directions. The key should rotate smoothly without any excess friction or resistance.
Finally, replace any additional hardware or trim that was removed during the installation process. Ensure that all screws and components are securely tightened.
Congratulations! You have successfully replaced and installed a new lock cylinder in your door.
Test the New Lock Cylinder
Once you have replaced the old lock cylinder with the new one, it is important to test it to ensure that it is functioning correctly. Testing the new lock cylinder will give you peace of mind and ensure the security of your door.
To test the new lock cylinder, follow these steps:
| 1 | Insert the key into the new lock cylinder. |
| 2 | Turn the key clockwise and counterclockwise to lock and unlock the door. |
| 3 | Make sure the lock is smooth and that the key turns easily in the cylinder. |
| 4 | Check that the door latches properly when the lock is engaged. |
| 5 | Test the key by locking and unlocking the door multiple times to ensure consistent performance. |
| 6 | If there are any issues or the lock is not working properly, remove the new lock cylinder and recheck the installation steps. |
Testing the new lock cylinder is crucial to ensure that your door is secure and that the lock functions correctly. By following these steps, you can be confident in the installation and performance of your new lock cylinder.
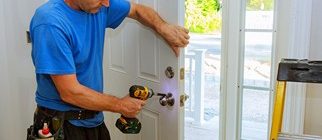
Install the Door Handle and Knob
Once you have replaced the door lock cylinder, it is time to install the door handle and knob. This step is essential as it allows you to operate the lock with a key and open the door correctly.
To begin, align the door handle and knob with the holes in the door. Make sure the keyhole on the door handle is facing the correct direction for easy access.
Next, insert the screws provided with the hardware into the holes on the door handle and knob. Use a screwdriver to tighten the screws securely, making sure the handle and knob are securely fastened to the door.
If the door handle and knob do not come with screws, make sure to measure the diameter of the holes and purchase screws of the appropriate size from a hardware store.
Once the screws are tightened, test the door handle and knob to ensure that they are functioning correctly. Insert the key into the lock cylinder and turn it to lock and unlock the door. The door handle and knob should move along with the lock cylinder, allowing you to control the lock mechanism.
With the door handle and knob installed, your door lock cylinder replacement is complete, and your door is now ready for secure use.
Check for Proper Fit
Before you install the new lock cylinder, it’s important to check for proper fit to ensure that the new hardware will work correctly with your door. Here are the steps to follow:
- Remove the old lock cylinder by unscrewing the mounting screws and pulling it out of the door. Take note of how the cylinder is positioned and oriented.
- Inspect the old lock cylinder for any signs of damage or wear. If it’s damaged or worn out, it’s definitely time to change it.
- Compare the old lock cylinder with the new one to ensure they are the same size and shape. The new cylinder should be an exact replacement for the old one.
- Check the key that came with the new lock cylinder. It should fit easily and smoothly into the keyway, without any resistance or sticking. If the key doesn’t fit properly, the lock cylinder may be incompatible with your door.
- Insert the new lock cylinder into the door, aligning it with the screw holes from the old cylinder. Make sure it’s properly seated and oriented the same way as the old cylinder.
- Tighten the mounting screws to secure the new lock cylinder in place. Be careful not to overtighten, as this can damage the hardware or the door.
- Test the new lock cylinder by inserting the key and turning it. The key should rotate smoothly and easily, without any sticking or resistance. If there are any issues, double-check the installation and make sure everything is aligned properly.
By checking for proper fit before you install the new lock cylinder, you can ensure that your door will have the right security and functionality. If you encounter any difficulties or the new lock cylinder doesn’t fit properly, it may be best to consult a professional locksmith to help you replace it.
Secure the Lock Cylinder
After removing the old lock cylinder, it’s important to ensure that the new one is properly secured in the door. This step is crucial for maintaining the security of your home.
Start by inserting the new lock cylinder into the door, aligning it with the opening. Use the key to ensure that the locking mechanism is aligned properly and works smoothly. Make sure that it turns and locks without any resistance.
Next, use the hardware provided with the new lock cylinder to secure it in place. This may include screws or other fastening devices. Follow the manufacturer’s instructions to ensure the proper installation and security of the lock cylinder.
Make sure to tighten all screws securely, but be careful not to overtighten as this may damage the cylinder or the door. Test the lock cylinder again to ensure that it is securely in place and functions correctly.
By properly securing the new lock cylinder, you can ensure that your door has enhanced security and protection. Remember, the purpose of this process is to replace the old lock cylinder and improve the security of your home.
Pro tip: Consider upgrading to a high-security lock cylinder for added protection. These types of lock cylinders offer advanced features, such as anti-pick and anti-drill mechanisms, to further enhance the security of your door.
Tighten the Door Handle and Knob
One important step in ensuring the security of your door is to make sure that the door handle and knob are tightly secured. Over time, these hardware components can become loose, making it easier for someone to access your home without a key. Here is a step-by-step guide on how to tighten the door handle and knob:
- First, close the door and make sure it is securely shut.
- Locate the screws on the interior side of the door handle and knob.
- Using a screwdriver, tighten the screws clockwise until they are snug. Be careful not to overtighten, as it can damage the hardware.
- Check the door handle and knob for any remaining wobbliness. If needed, continue to tighten the screws until the hardware is secure.
- After tightening, test the door handle and knob by turning it and making sure it operates smoothly.
- If the door handle and knob are still loose after tightening, it may be necessary to replace them with new ones.
By ensuring that the door handle and knob are tightly secured, you can enhance the overall security of your door. However, if you are looking to upgrade your door’s security, it is recommended to consider changing the door lock cylinder. This will require a bit more effort and knowledge, but it can greatly increase the level of security for your home. Here is a step-by-step guide on how to change a door lock cylinder.
Remember, always prioritize the security of your home by regularly checking and maintaining your door hardware.
Check the Lock Functionality
Before you install a new lock cylinder, it’s important to check the functionality of the existing lock. Insert the key into the lock and turn it to ensure that the lock mechanism is working smoothly. If the key gets stuck or the lock is difficult to turn, it may be a sign that the lock cylinder needs to be replaced.
Additionally, check if there is any visible damage or wear on the lock hardware. If the lock is old or damaged, it is a good idea to replace it along with the cylinder. A new lock will provide better security and peace of mind.
Reassemble the Door
After you have successfully changed the lock cylinder, it’s time to reassemble the door and test the new lock for security.
Start by replacing any hardware that you removed from the door, such as the strike plate and latch. Make sure that everything is aligned properly and securely fastened.
Next, install the new lock cylinder according to the manufacturer’s instructions. Use your key to test that the lock operates smoothly and correctly. If there are any issues, double-check the installation and make any necessary adjustments.
Finally, close the door and test the lock from both the inside and outside. Ensure that it locks and unlocks easily and that the door is secure when locked. If you encounter any problems, consult the manufacturer’s documentation or consider calling a professional locksmith for assistance.
By following these steps, you can effectively change a door lock cylinder and improve the security of your home or office.
Test the Door Lock
After you have successfully changed and installed the new door lock cylinder, it is important to test the security and functionality of the lock.
Insert the key into the lock and turn it clockwise and counterclockwise to ensure that the lock is working smoothly. The key should easily rotate without any resistance or sticking.
Next, lock and unlock the door to verify that the latch is correctly aligned and engaging properly with the strike plate. The lock should securely hold the door in place when it is locked, and the latch should easily retract when the key is turned to unlock the door.
If you encounter any issues during the testing process, such as difficulty in turning the key or problems with the latch, you may need to adjust the lock or replace the hardware to ensure proper functionality and security.
Remember, a well-functioning and secure door lock is essential for the safety and protection of your home or property. Regularly inspect and maintain your locks to ensure they are in good working condition and consider replacing or upgrading them if necessary to enhance your overall security.
Finishing Touches
After you have successfully replaced and installed the new door lock cylinder, it’s time to put the finishing touches on the hardware and ensure the security of your door.
First, make sure the lock is functioning properly by testing it with a key. Insert the key into the lock and turn it in both directions to ensure smooth operation.
Next, check the alignment of the strike plate. This is the metal plate that is attached to the door jamb and helps secure the door when it is locked. Adjust the strike plate if necessary to ensure that the lock engages smoothly and securely.
Once the lock and strike plate are properly aligned, tighten any screws or bolts that may have been loosened during the installation process. This will ensure that the lock is securely fastened to the door.
Finally, test the lock again to make sure everything is in working order. Open and close the door several times, locking and unlocking it with the key. If everything is functioning properly, your door lock cylinder replacement is complete.
Remember, changing a door lock cylinder is an important step in maintaining the security of your home or business. By following these step-by-step instructions, you can easily change a door lock cylinder and ensure that your door is secure.
Q&A:
What tools do I need to change a door lock cylinder?
To change a door lock cylinder, you will need a screwdriver, a hex key or Allen wrench, a hammer, a chisel, and a new lock cylinder.
Is it necessary to remove the door from its hinges to change the lock cylinder?
No, it is not necessary to remove the door from its hinges. You can change the lock cylinder while the door is still attached to the frame.
Can I use the same keys for the new lock cylinder?
If you purchase a new lock cylinder that is compatible with your existing keys, you can use the same keys. Otherwise, you will need to get new keys made for the new cylinder.
How long does it usually take to change a door lock cylinder?
The time it takes to change a door lock cylinder can vary depending on your level of experience and the complexity of the lock. However, it can generally be done within 30 minutes to an hour.
What should I do if I encounter any difficulties or obstacles while changing the lock cylinder?
If you encounter any difficulties or obstacles while changing the lock cylinder, it is recommended to consult the manufacturer’s instructions or seek assistance from a professional locksmith. They will be able to provide guidance and help you overcome any challenges you may face.